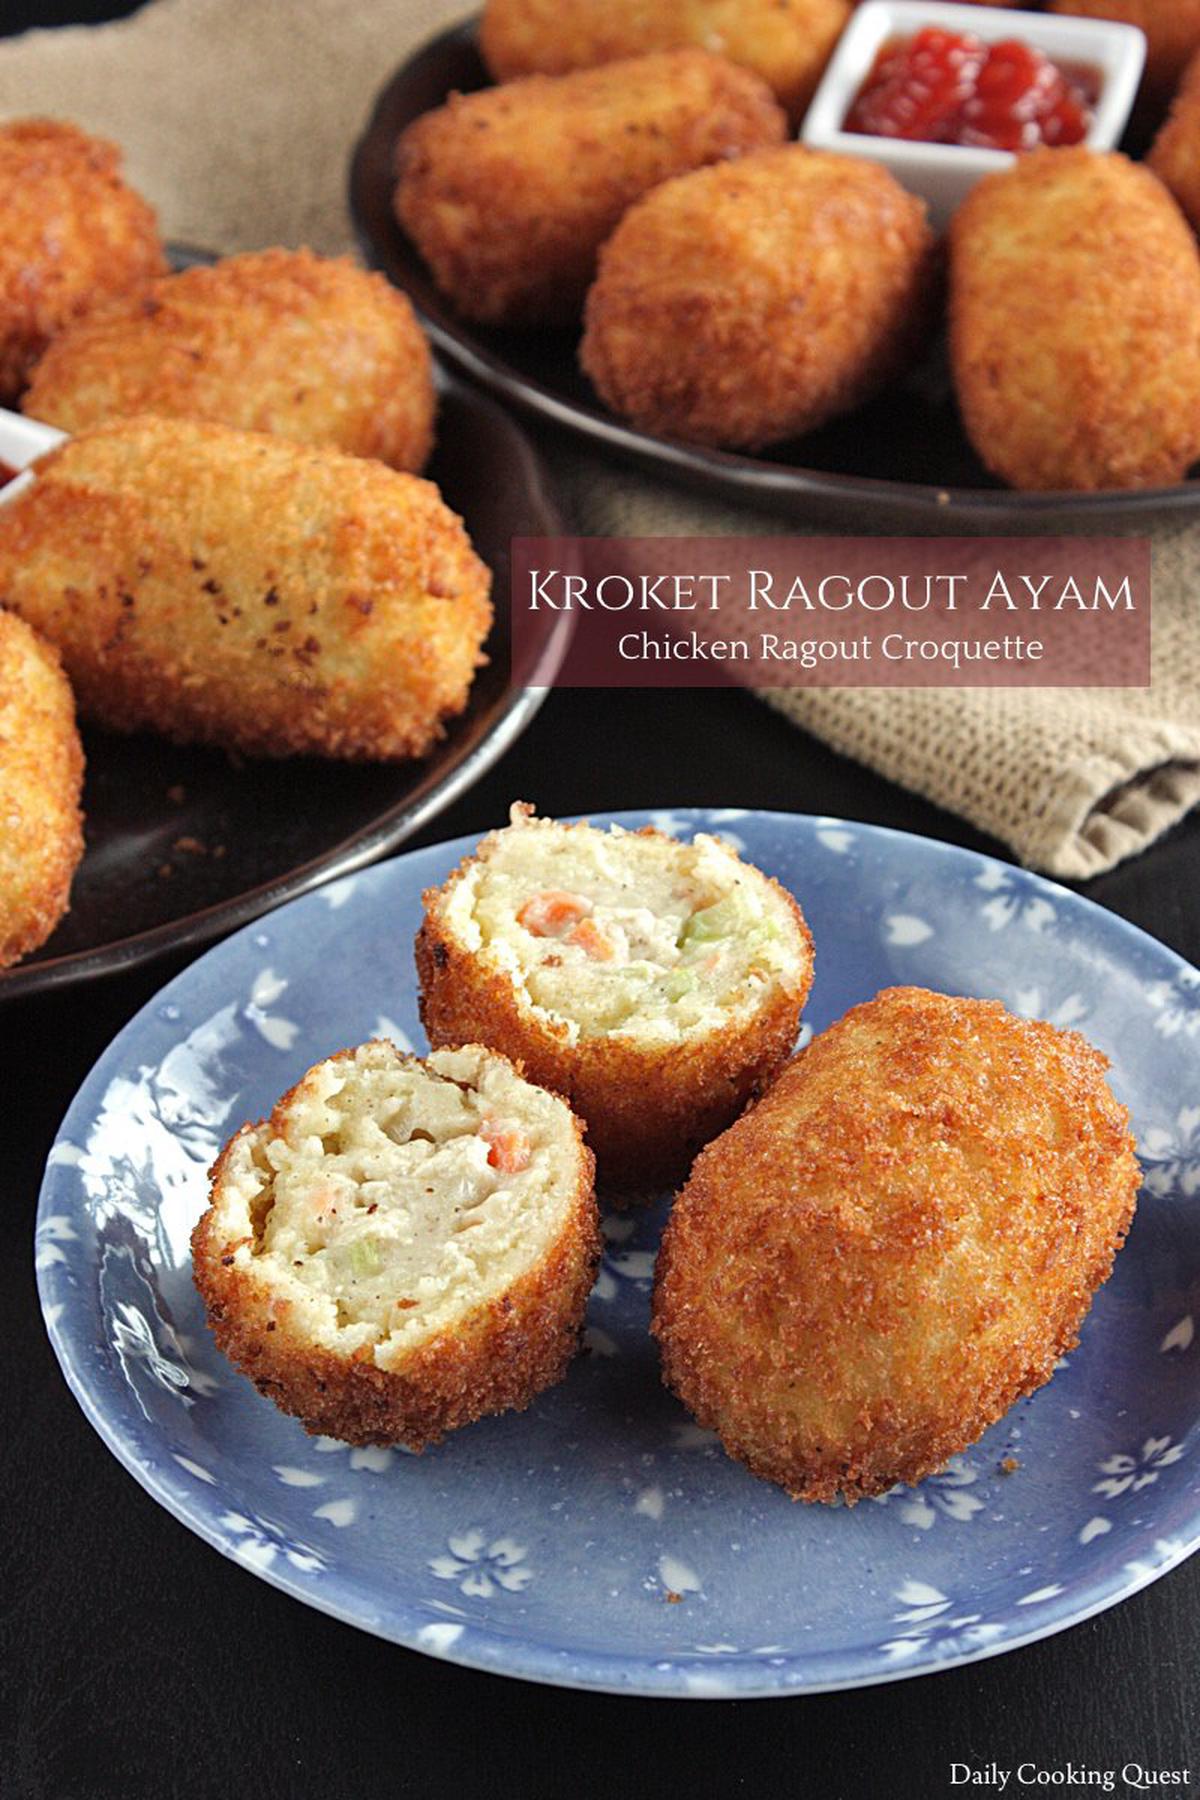
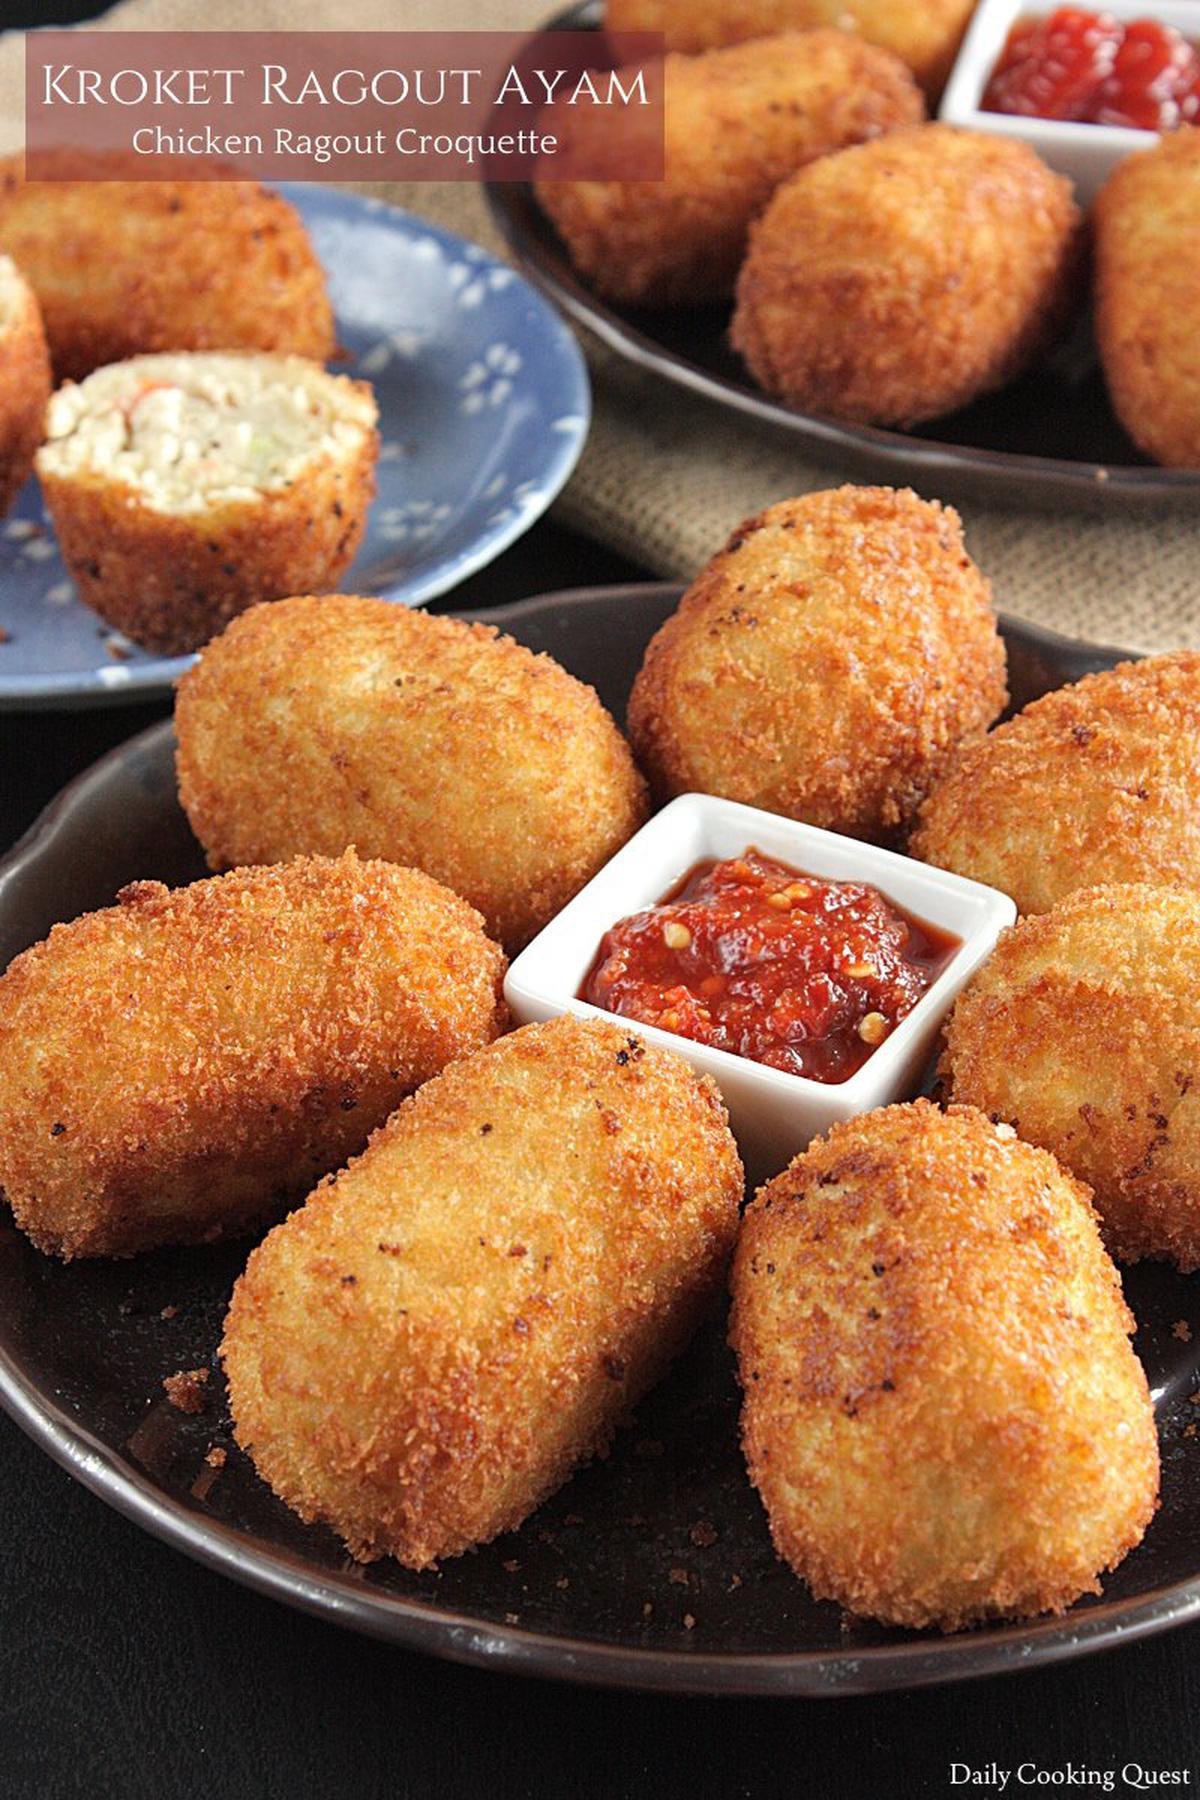
Home / All Recipes / Indonesian / Kroket Ragout Ayam - Chicken Ragout Croquette
Kroket Ragout Ayam - Chicken Ragout Croquette
Indonesia inherit croquette from its Dutch colonial past. There are a lot of croquette varieties, but basic Indonesian croquette has savory filling wrapped in mashed potato, coated with egg and bread crumbs and deep fried until golden brown. The most common and popular one is probably kroket ragout ayam - chicken ragout croquette, but nowadays there are many new and creative filling, such as kroket rendang!
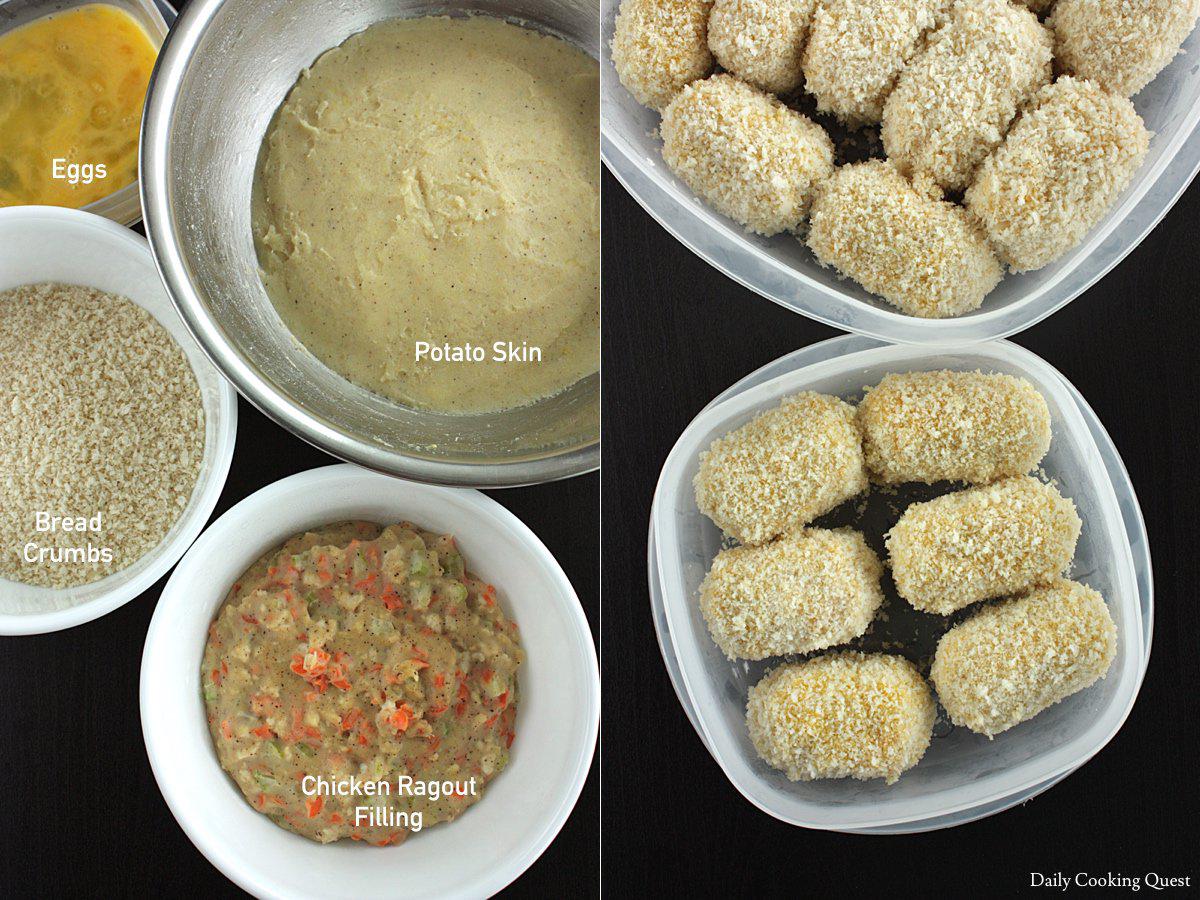
Multi Stages Prep Work
Be warned that croquettes takes time to prepare. Start one day ahead to prepare the skin (mashed potato) and filling (chicken ragout). Place each in a mixing bowl, cover with plastic wrap, and chill in the fridge. Next day, take both bowls out from the fridge and divide each into 16 portions. Crack 2 eggs (sometimes I need 3) in a bowl, and fill another bowl with bread crumbs (~ 2 cups). Take a portion of potato skin and flatten, fill with a portion of filling, gently gather the potato to wrap the filling and roll into a cylindrical shape. Coat with bread crumbs, then dip in eggs, and coat again with bread crumbs. Once you have shaped all the croquettes, simply heat up some oil for deep frying and fry until golden brown.
The Easier Way
Once you get the basic idea of how to prepare Indonesian croquette, you can start playing around with variety of filling. In my next recipe, I will show you how to prepare kroket panggang - baked croquette. With baking method, you can very easily prepare and serve croquette. Best of all, no shaping individual croquette, and no deep frying. If this sounds like your cup of tea, be sure to stay tune for my next croquette recipe.
Kroket Ragout Ayam - Chicken Ragout Croquette
Ingredients
- Skin
- 600 gram peeled potato
- 1 tablespoon butter
- 1/2 teaspoon salt
- 1/4 teaspoon ground pepper
- 1/2 teaspoon ground nutmeg
- 1 egg yolk
- Filling
- 2 tablespoon butter
- 100 gram ground chicken
- 50 gram carrot, diced
- 1 celery stick (~ 50 gram), diced
- 3 tablespoon all purpose flour
- 200 ml milk
- 1/2 teaspoon salt
- 1/4 teaspoon ground pepper
- 1/2 teaspoon sugar
- 1/4 teaspoon nutmeg
- Coating
- ~ 2-3 eggs, lightly beaten
- ~ 2 cups bread crumbs
- Other
- enough oil for deep frying
Instructions
- Skin
- Steam potato until soft enough to mash. Remove from steamer and place in a mixing bowl. Mash potato and mix with butter, salt, ground pepper, ground nutmeg, and egg yolk. Set aside to cool completely.
- Filling
- Melt butter in a frying pan over medium high heat. Sauté ground chicken, diced carrot, and celery . Cook until the chicken is no longer pink.
- Add all purpose flour, stir to mix, then pour milk and keep on stirring until the sauce is smooth with no flour clumps.
- Season with salt, ground pepper, sugar, and nutmeg. Set aside to cool completely.
- Croquette
- Divide both skin (potato mixture) and filling (chicken ragout mixture) into 16 portions.
- Flatten a portion of skin, place a portion of filling at the center, gather the edges of the potato skin to wrap the filling, gently roll into a cylindrical shape.
- Coat with bread crumbs, then dip into lightly beaten eggs, and coat again with bread crumbs. Set aside.
- Repeat for the rest of skin and filling.
- Heat enough oil in a pot/wok for deep frying. Once the oil is hot (~ 170 Celsius/340 Fahrenheit), deep fry croquettes until golden brown. Serve immediately.


Leave a comment